

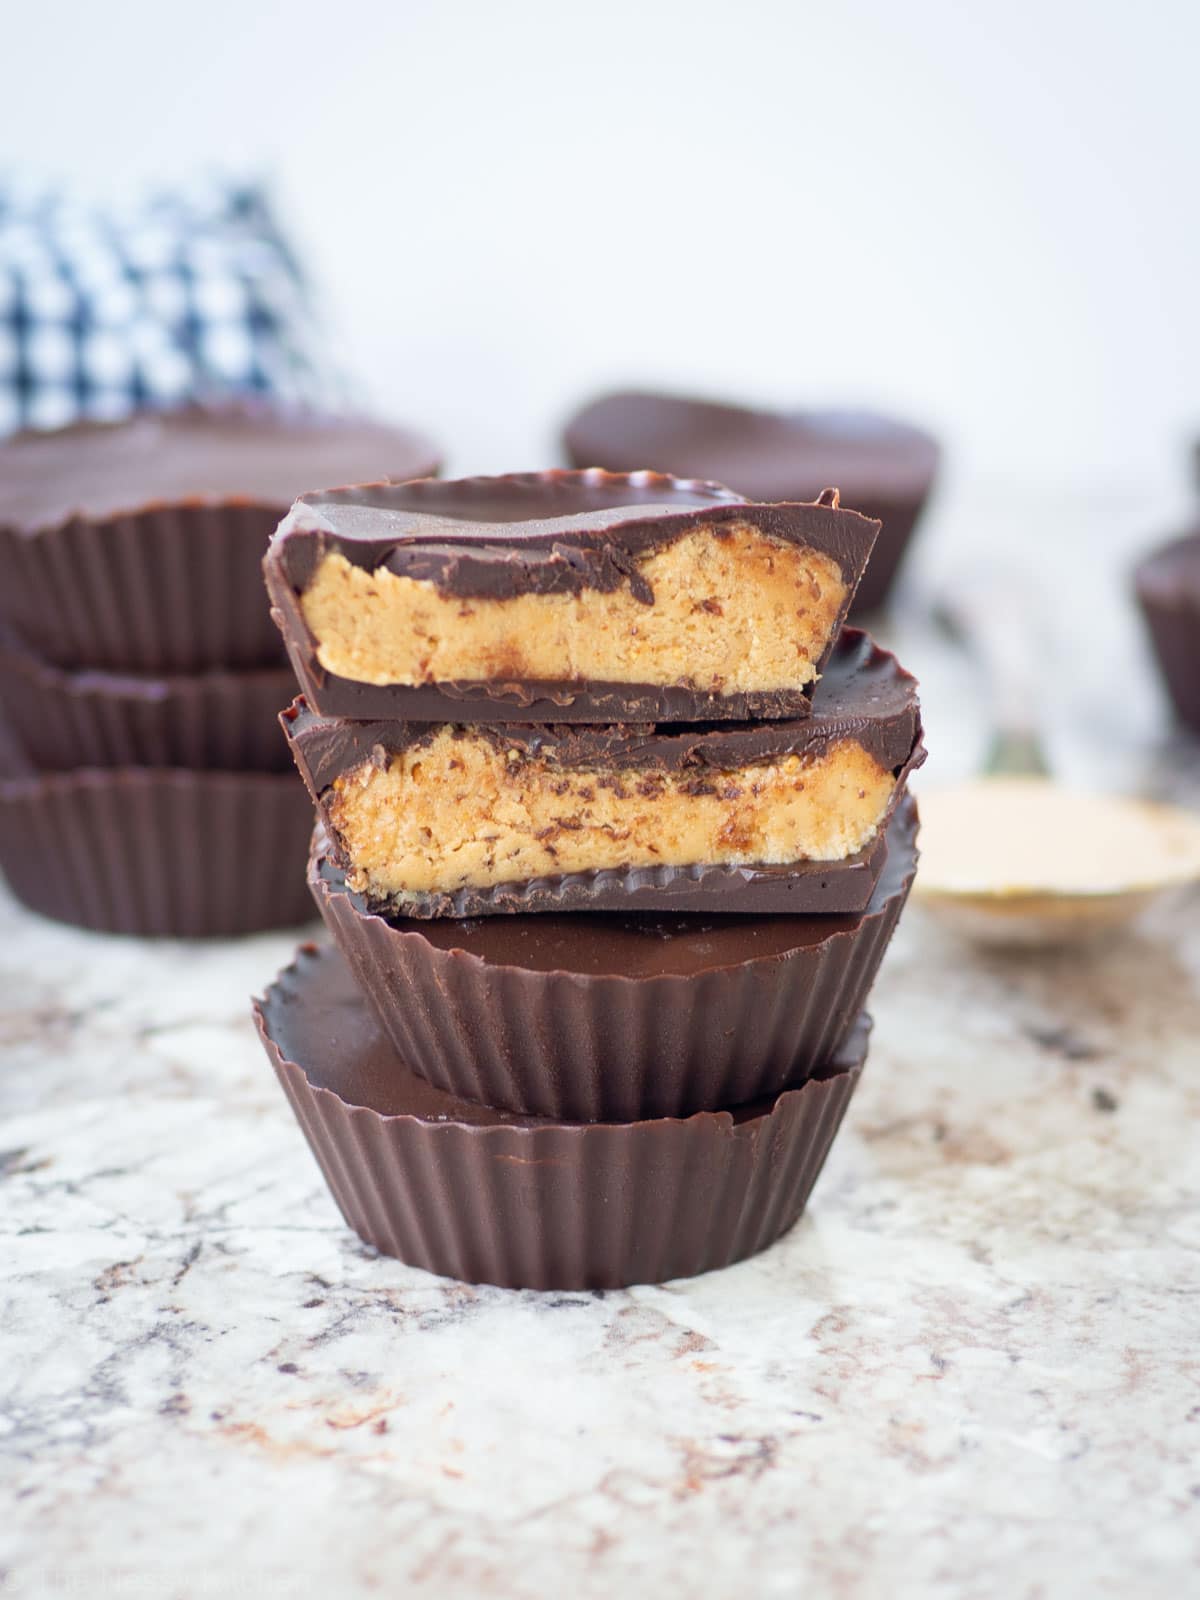
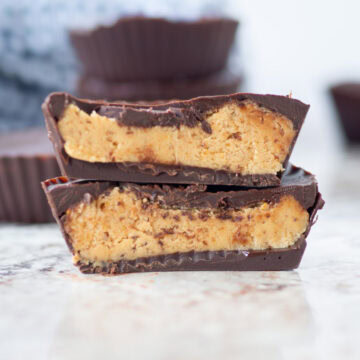
Inspired by the classic "Reese's" chocolate bar but with a healthier twist, these high protein peanut butter cups are every bit as delicious as the original. Naturally sweetened and packed with 6 grams of protein per cup, this satisfying no bake treat is ready in minutes with just 7 wholesome ingredients.
Jump to:
Peanut butter + chocolate is hard to beat! It's no wonder that eatmore bars are my all time favorite chocolate bars.
But "Reese's" peanut butter cups have always been a really close second.
While I do enjoy a store-bought chocolate bar every once in a while, I love creating more wholesome versions at home to enjoy more often and that don't sacrifice flavor.
And I have to say, I might just enjoy these protein peanut butter cups even more than the candy bar that inspired them! I have a feeling that you will too because they are:
- The Best Flavor Combo. A dark chocolate shell and creamy peanut butter filling, these deliver on the classic taste that you know and love. (As do these Homemade Oreos).
- Extra Satisfying. With the addition of pea protein isolate, these treats contain a bit of extra protein to make them more filling while satisfying your craving for candy bar flavor.
- No-Bake Treat. Ready in minutes and without the need to turn on your oven, these treats can conveniently be whipped up in a hurry. And are great for hot days when you don't want to start the oven. (As is this Chocolate Pecan Bark).
The Ingredients
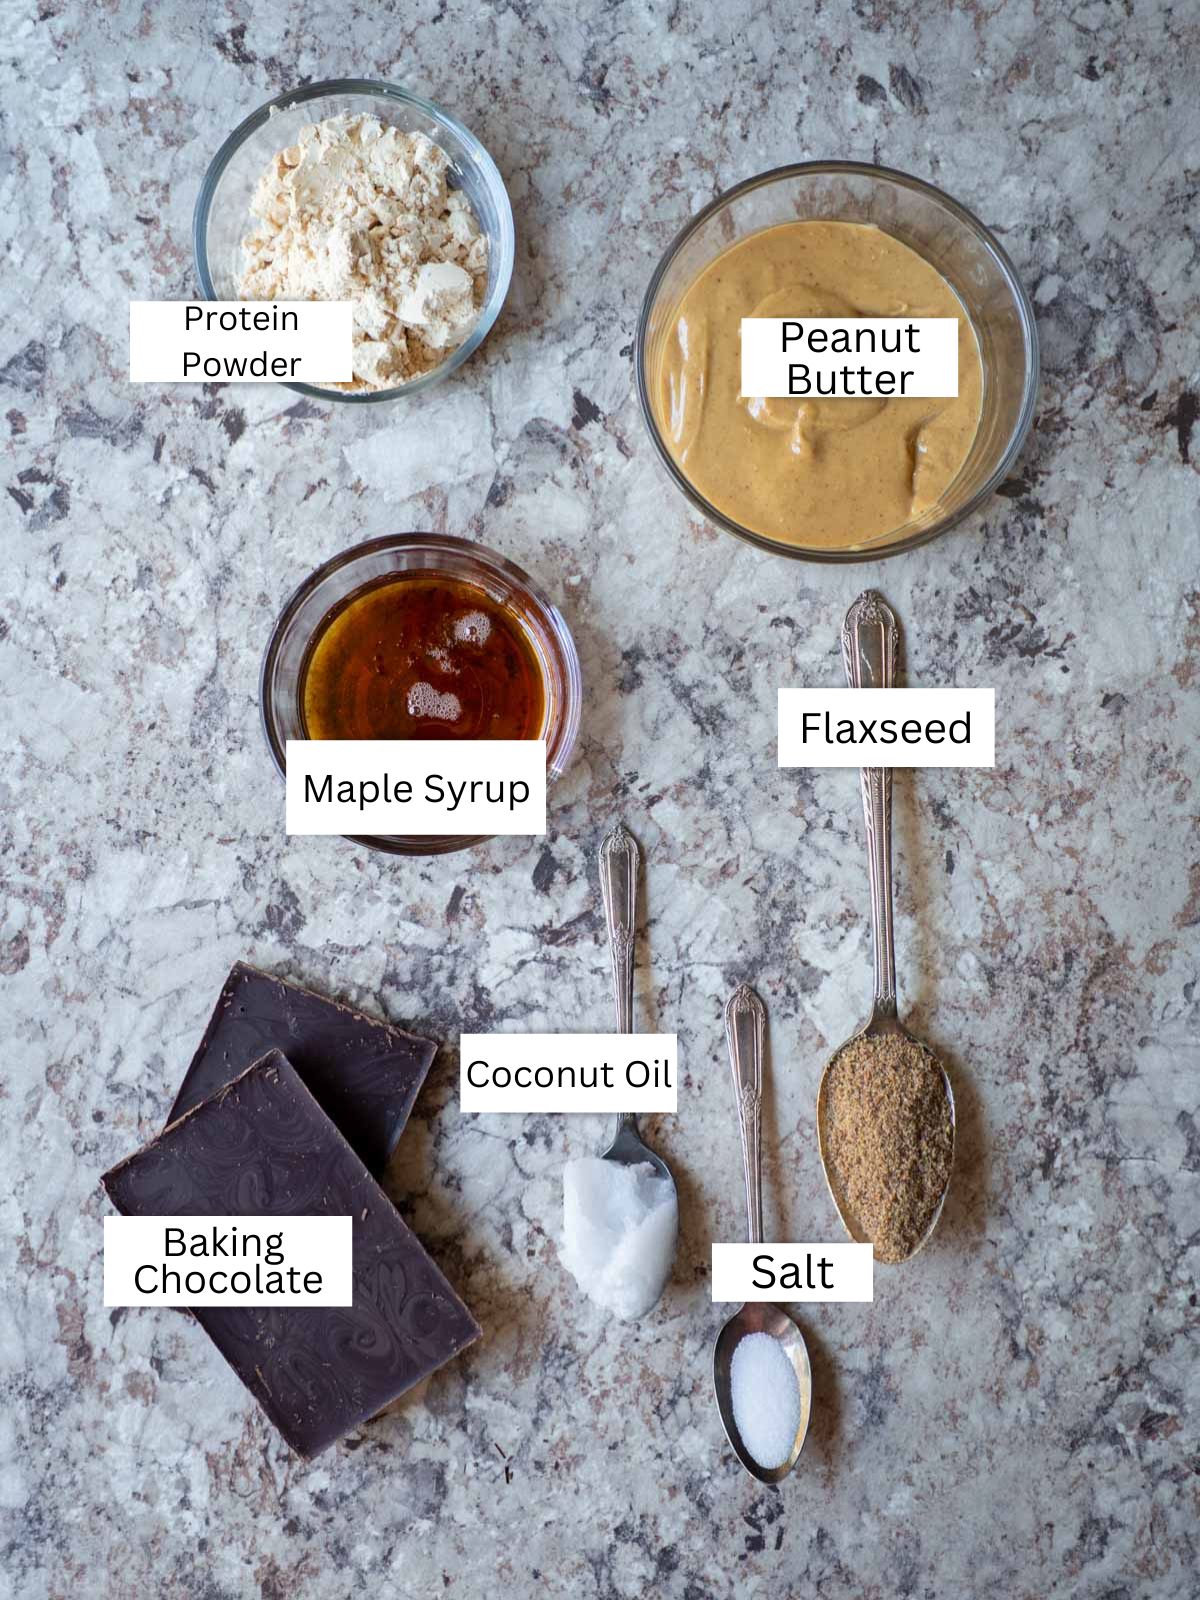
- Baking Chocolate- I prefer to use a combination of semi-sweet and unsweetened chocolate or a bar of dark baking chocolate for a deep cocoa flavor. You can use all semi-sweet or even milk chocolate if you prefer a sweeter shell.
- I recommend using a high quality baking chocolate. It is best to not use chocolate chips as they are not designed to be melted.
- Coconut Oil- Just a touch of coconut oil helps the chocolate to melt smoothly and to have a bit of a glossy finish. Butter can also be used.
- Peanut Butter- I like to use smooth, natural style peanut butter (the only ingredients are peanut butter) but I suspect that it would work with shelf stable peanut butter as well.
- Maple Syrup- This gives the peanut butter filling its sweetness. Honey or another sweetener of choice can be used. Note, that if you use a granulated sweetener, you may need to omit the flaxseed and add more peanut butter to achieve the right consistency.
- Pea Protein Isolate- I tend to make these with unflavored pea protein isolate. Brown rice protein powder will work as well in terms of consistency but I find that the pea protein flavor tastes better with the peanut butter.
- Ground Flaxseed- Along with the protein powder, this helps to thicken the peanut butter filling (just like it does in these peanut butter stuffed dates). You can replace it with almond flour, blended rolled oats (to make homemade oat flour) or leave it out if you are okay with a slightly thinner filling consistency.
- Salt- Just a touch enhances the flavor of the filling. I also like to use a bit of coarse sea salt to garnish the tops.
The Method
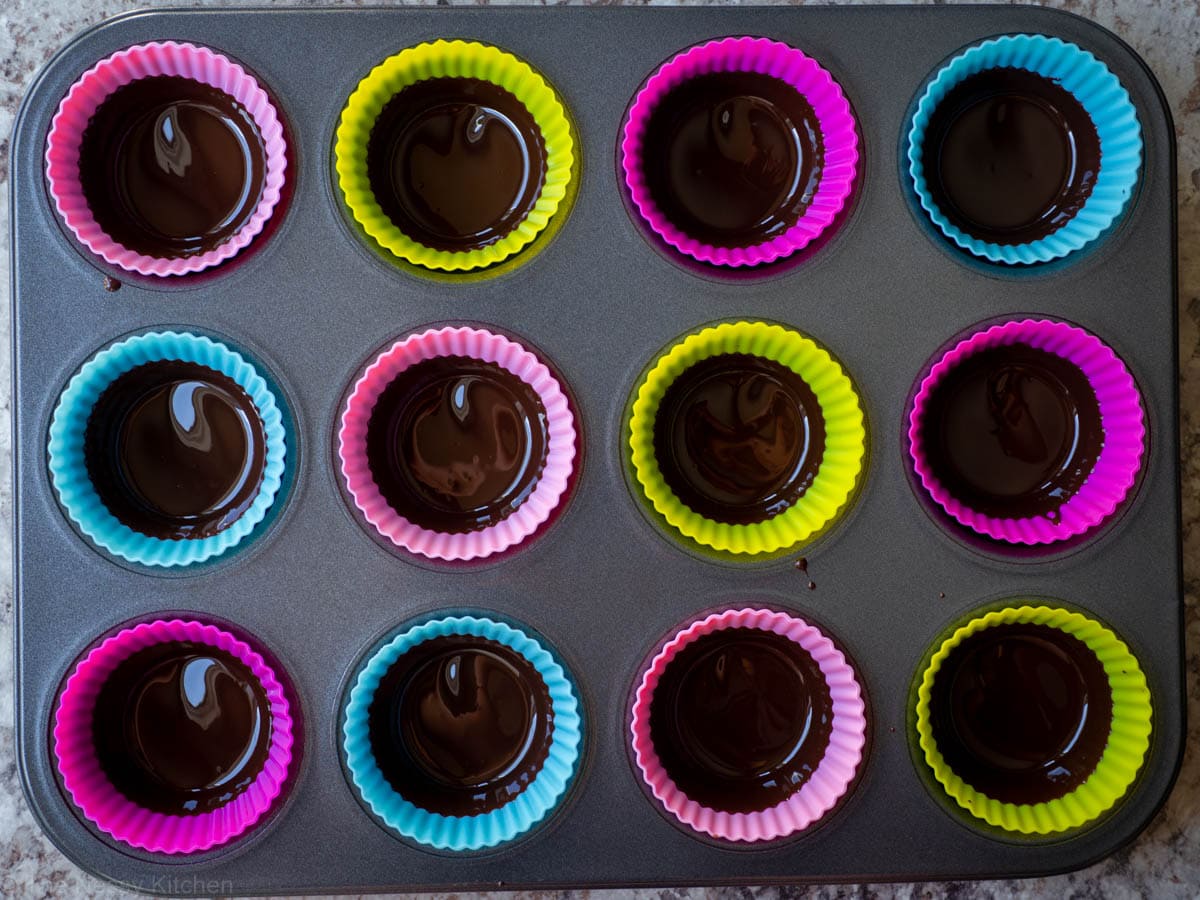
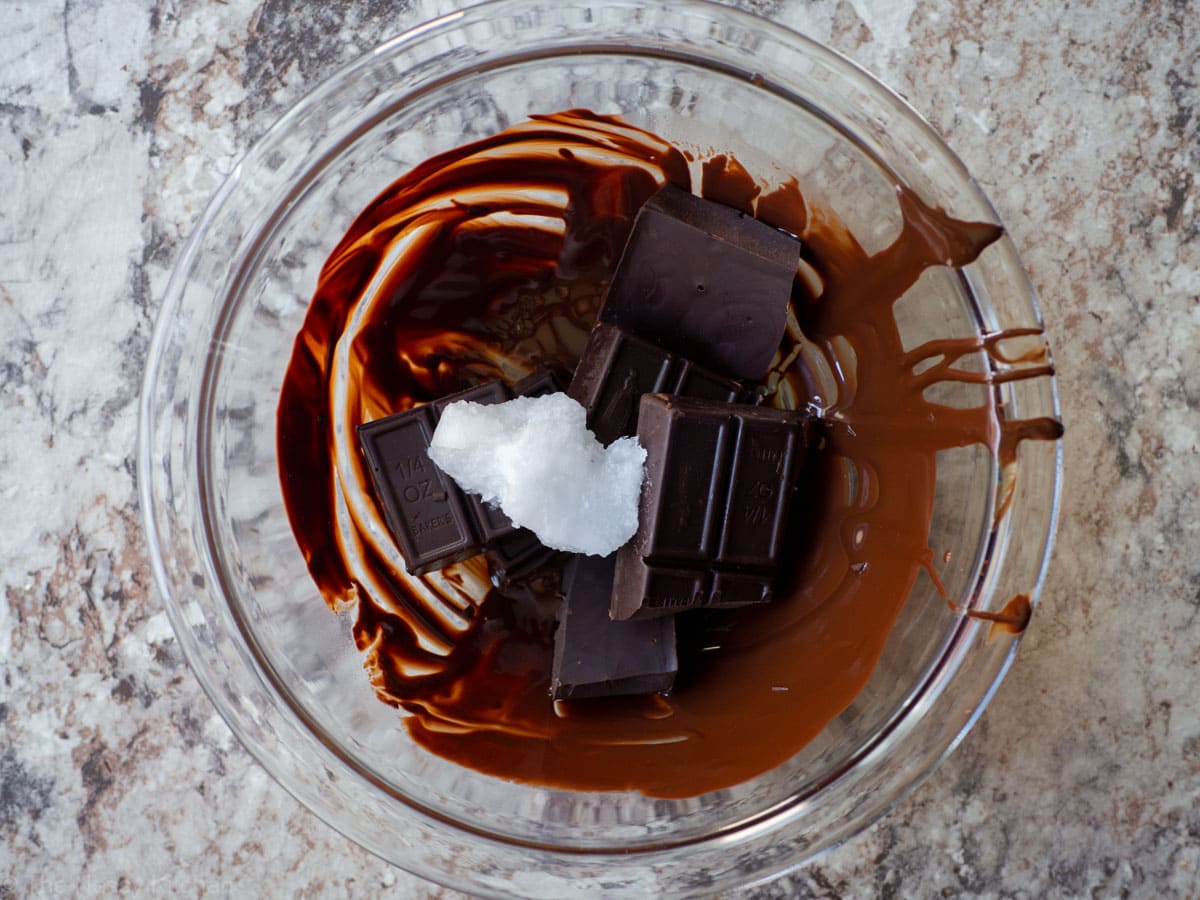
1. Prepare the base. Roughly chop the chocolate and add half of it along with 1 teaspoon of coconut oil to a microwave safe bowl. Microwave in 20 second intervals, stirring between each until melted.

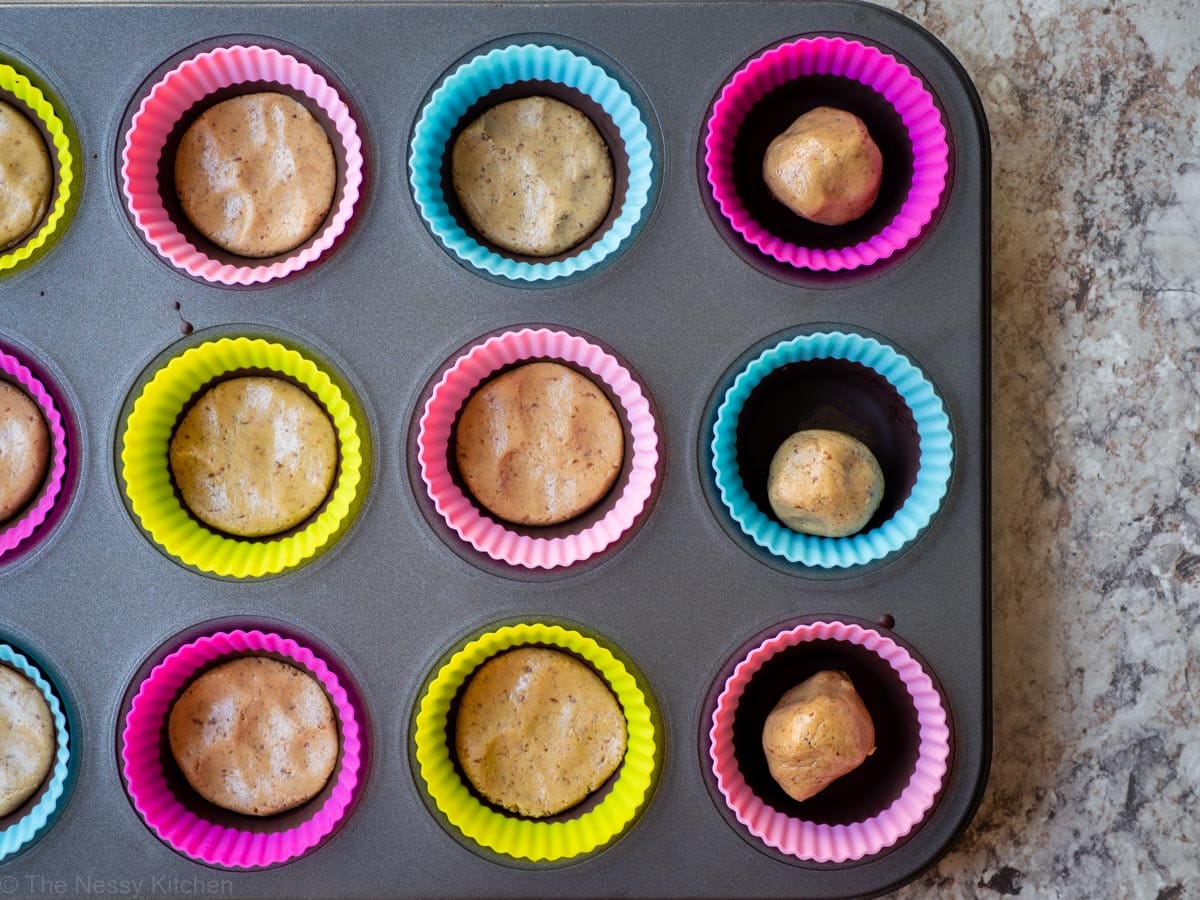
Place 12 silicone muffin liners (or paper liners) in a tin and using a spoon, fill the bottom with about ½ tablespoon of melted chocolate. Tilt the pan to coat the sides or use the back of a spoon to spread the chocolate up the sides of each cup a little bit (it doesn't need to be perfect!).
Place the pan in the freezer for 10 minutes to allow the chocolate to set.
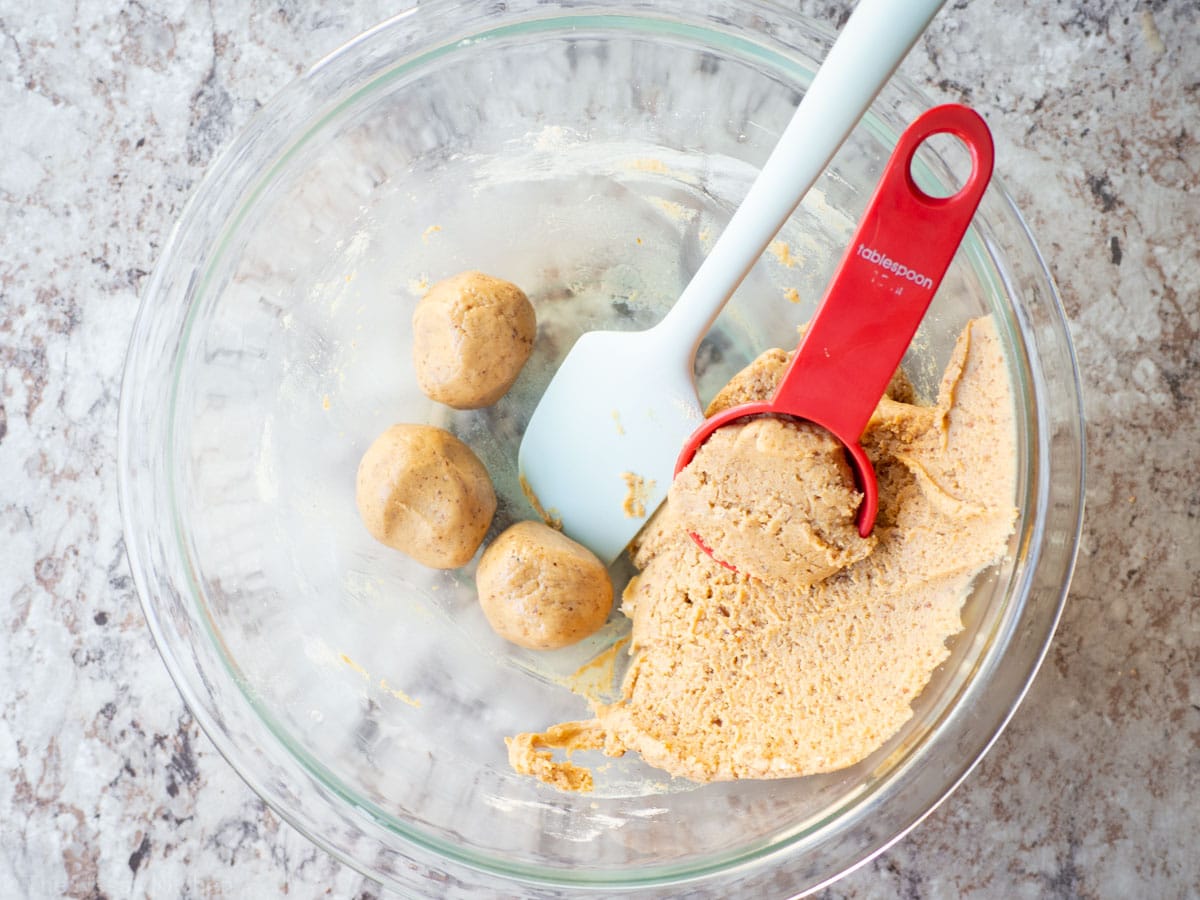
2. Make the filling. Meanwhile, as the chocolate sets, in a medium bowl, mix the peanut butter, maple syrup, pea protein isolate, salt and ground flaxseed until well combined and smooth.
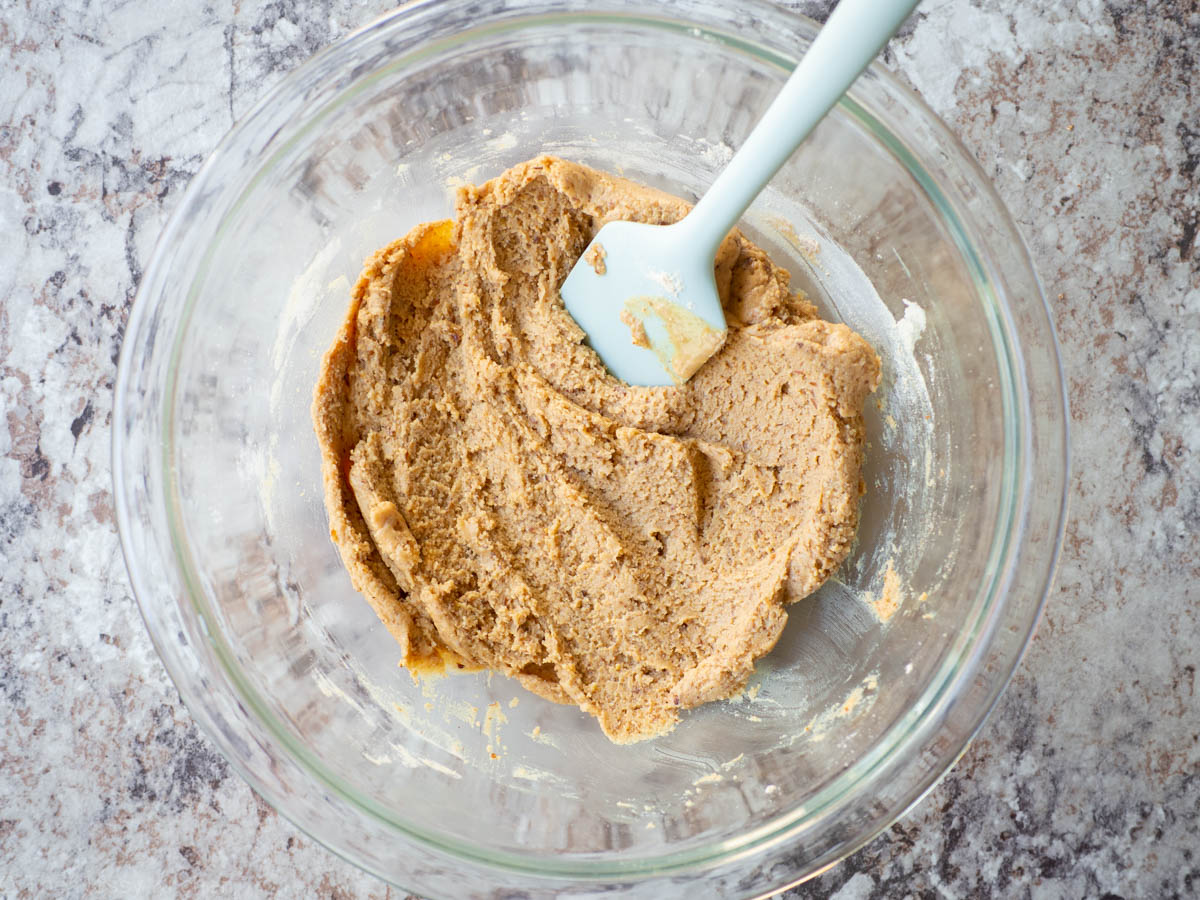
Roll the peanut butter filling into ~1 tablespoon balls (you should get 12 of them).
Remove the pan from the freezer and place the peanut butter balls in each, pressing down to flatten them almost to the edges.
3. Finish the shell. Add the remaining chopped chocolate and teaspoon of coconut oil to the same microwave safe bowl and melt in the microwave for 20 second intervals, stirring between each until melted.
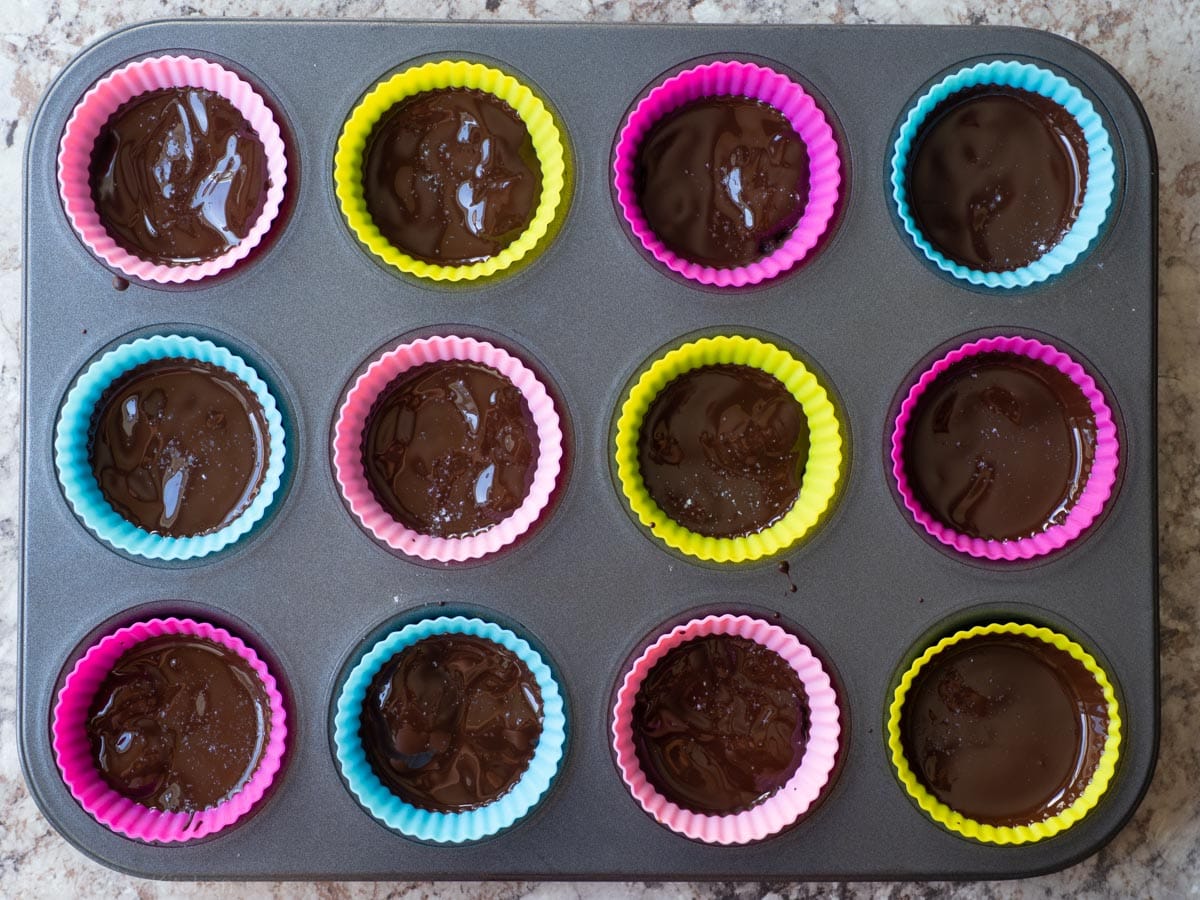
Divide the chocolate over the peanut butter balls (about ½ tablespoon each).
4. Set. Return the pan to the freezer for another 15-20 minutes, or until the chocolate is fully set.
5. Enjoy!
Leftovers and Storage
To Store: Store protein peanut butter cups at room temperature for up to 2 days or in the refrigerator for up to 5 days. If your house is warm, I recommend storing in the refrigerator rather than at room temperature as the chocolate may get a bit melty.
To Freeze: These can also be frozen for up to 3 months. You can enjoy them frozen (they retain a fairly soft texture, even in the freezer) or allow them to thaw to room temperature for a few minutes.

Make it Your Own
- White Chocolate PB Cups- Swap the baking chocolate for white baking chocolate for a sweeter twist on these treats. Or try these White Chocolate Peanut Butter No Bake Cookies.
- Crunchy PB Cups- For added texture, use crunchy peanut butter instead of smooth (but add 1 extra tablespoon) or stir in 2-3 tablespoons of finely chopped peanuts to the filling.
- Adjust the Thickness- I have written this recipe for the peanut butter filling to be a bit on the thicker side as that is how I prefer them. If you would like a thinner filling, double (or 1.5 times) the amount of chocolate used and make 24 (or 18) cups instead with ½ tablespoon of the peanut butter filling in it rather than 1 tablespoon.
- Peanut-Free Option- You can substitute the peanut butter with another nut or seed butter, such as almond butter, macadamia butter, pepita butter or sunflower seed butter. They will definitely have a different flavor (and color) but are still delicious.

Adjusting for Different Protein Powders
For your personal nutrition and digestion, you may decide to use different protein powders. And if you need help deciding that, you may want to seek more information from a dietitian or nutrition professional.
But let's talk about how what protein powder you use will affect the recipe and how to adjust for it.
For reference, I typically use either pea protein isolate (though brown rice protein or a combination will work) and so the recipe is written for that. This protein powder both absorbs a lot of moisture and has no added flavoring. If you opt for a different powder, keep the following in mind:
- Consistency: Plant-based protein powders tend to absorb a lot more liquid than animal based powders.
- If using an animal based powder, such as whey, you may need to add a bit more to achieve the right consistency or you can add 1-2 tablespoons of almond flour or additional ground flaxseed as needed.
- The consistency of the filling should not be sticky but still be moldable (similar to play dough).
- Flavor: If you use a flavored powder, ensure that it complements the flavors of the peanut butter cups (such as vanilla).
- Also, you may want to reduce the maple syrup if the protein powder that you are using is sweetened.

I typically use either pea protein isolate but you can adapt the recipe to what you like to use. Just keep the following in mind.
-Flavor: If you use a flavored protein powder, ensure that it complements the flavor of the peanut butter cups. You may want to reduce the maple syrup if yours is sweetened.
-Consistency: Plant-based protein powders tend to absorb a lot more liquid than animal based powders. If using an animal based powder, such as whey, you may need to add a bit more to achieve the right consistency or you can add 1-2 tablespoons of almond flour or additional ground flaxseed as needed. The consistency should be shape-able but not sticky (similar to play dough).
If you'd prefer to make these without protein powder, you can replace the powder with ground almonds (almond flour or meal) or with blended oats (to make oat flour). Keep in mind that this will affect the nutritional values and the protein content.
Tips and Notes
- Melt the Chocolate in Stages. You only want to melt half of the chocolate at the beginning to create the bottoms of the cups. Then save the rest for melting later when you're ready to top off the cups so that it doesn't harden in the bowl while you wait.
- Adjust the Consistency. When you make the peanut butter filling, depending on your protein powder, you may need to adjust the mixture to achieve the right consistency. If it seems too thick, add a few drops of water and if it's too runny, add a little more ground flaxseed. It should be moldable but not sticky (similar to play dough).
- Allow to Set Completely. Once fully assembled, allow the cups to set for the full amount of time so that they don't crumble when you remove them from the silicone liners.
And if you liked this recipe...
...you might also like:
- Chocolate Peanut Butter Protein Bars
- Peanut Butter Chocolate Rice Crispy Squares
- Chocolate Peanut Butter Protein Balls
Recipe Card
Protein Peanut Butter Cups
Ingredients
- 6 oz baking chocolate divided (I used half semi-sweet and half unsweetened)
- 2 teaspoon coconut oil
- ½ cup natural style, smooth peanut butter
- ⅓ cup pea protein isolate powder
- ¼ cup maple syrup
- 1 and ½ tablespoon ground flaxseed
- ½ teaspoon fine sea salt
- coarse sea salt optional, for sprinkling
Instructions
- Roughly chop the chocolate and add half of it along with 1 teaspoon of coconut oil to a microwave safe bowl. Microwave in 20 second intervals, stirring between each until melted.
- Place 12 silicone muffin liners in a tin and using a spoon, fill the bottom of about ½ tablespoon of melted chocolate. Tilt the pan to coat the sides or use the back of a spoon to spread the chocolate up the sides of each cup a little bit. Place the pan in the freezer for 10 minutes to set.
- Meanwhile, mix together the peanut butter, maple syrup, pea protein isolate, salt and ground flaxseed in a medium bowl until well combined and smooth, adding a few drops of water if necessary.
- Roll the peanut butter filling into ~1 tablespoon balls (you should get 12 of them). Remove the pan from the freezer and place the peanut butter balls in each, pressing down to flatten them almost to the edges.
- Add the remaining chopped chocolate and teaspoon of coconut oil to the same microwave safe bowl and melt in the microwave for 20 second intervals, stirring between each until melted. Divide the chocolate over the peanut butter cups (about ½ tablespoon each).
- Return the pan to the freezer for another 15-20 minutes or until the chocolate is fully set.
- Remove from the silicone liners and enjoy!
Marie says
These were so good! PB cups are one of my favorite treats and the texture was spot on for these.